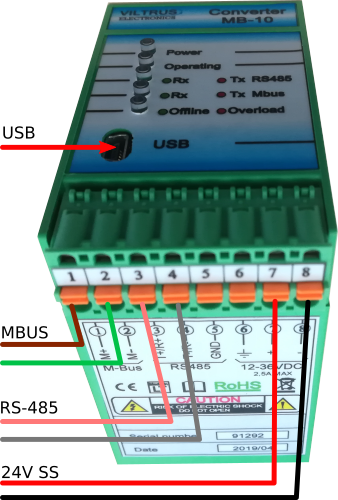
The Viltrus MB-10 acts as a concentrator on the MBus bus and the data from it is available over the RS-485 bus via the Modbus RTU protocol.
Wiring
As described, connect the MBus bus to the individual terminals, RS-485 to the concentrator (be careful, the polarity of the wires matters), and a 12-36 V DC power supply.
Settings
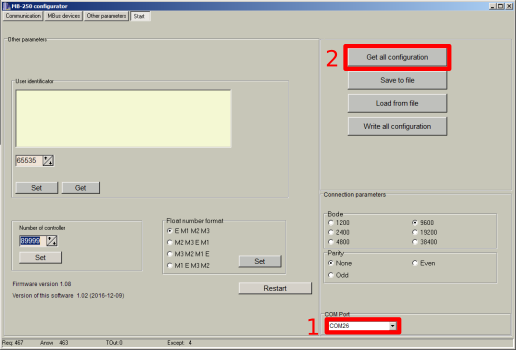
Once all the meters on the MBus bus have been set up and connected to the converter, connect to the converter via USB cable (with Mini connector) and run the MB_250 configuration program.
If the converter has not paired itself with the computer, you need to select the correct COM port (1) and load the configuration using the Get all configuration button.
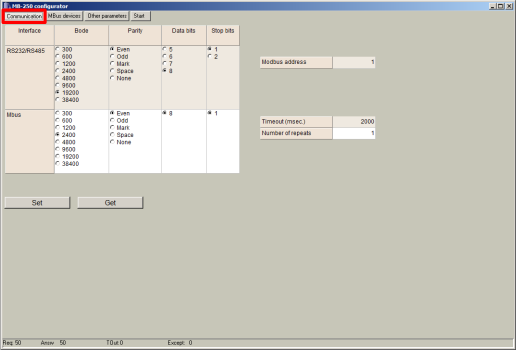
On the Communication page, check the communication settings on the RS-485 line. This must be the same for all devices on the bus.
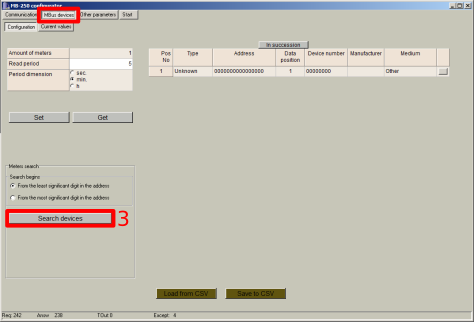
On the MBus devices page, the configuration of the read out meters takes place. Click on the Search devices button (3) to start the search for meters. This can take around a minute if there are multiple meters.
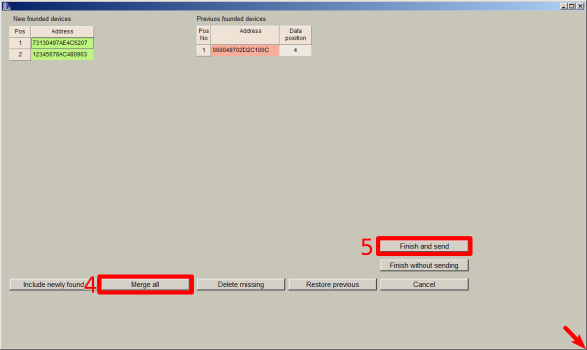
After searching for gauges, a table with the result will be displayed. Click on Merge all (4) to add the newly found gauges to the list. Click Finish and send to save the changes. The Buttons are hidden behind the edge of the screen if they are not visible. By dragging the bottom right corner of the mouse, the window can be enlarged.
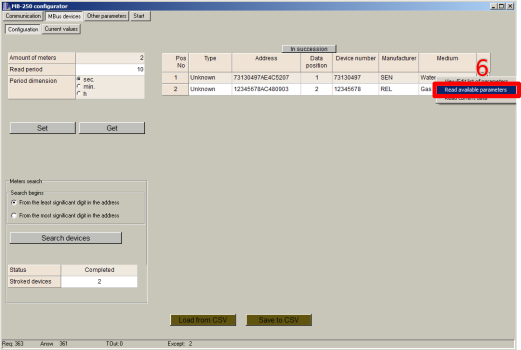
In the list of gauges, click on the rectangle at the end of the row and select Read available parameters (6).
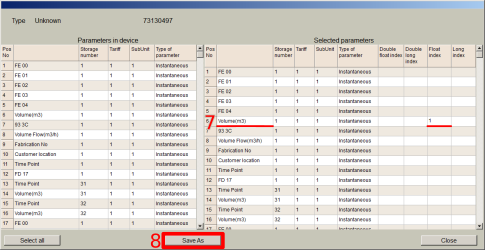
A list of all the information the meter sends is displayed. We are not interested in all of them, so we write the numbers to which registers the value should be stored only to some variables in the Float index (decimal numbers) or Long index (integers) column.
For water and gas meters we are interested in the state - volume, so we write the number 1 in the row Volume(m3), column Float index.
In the case of an electricity meter or calorimeter, we would then be interested in the value in the Energy row.
*If a quantity is listed more than once, we are normally interested in the one that is highest in the list (in the figure above, Volume is on rows 6, 14 and 16, so we select the value on row 6).
If we are interested in more than one quantity, we number them consecutively 1, 2, 3, etc.
After filling in all the register numbers, click the Save as button (8), save under the name of the gauge type (for example Sensus HRI).
Now assign the newly created type to the gauge by clicking in the Type column (10) and selecting the correct type. Repeat this and the previous step for all gauge types. If there are multiple gauges of the same type, assign them the same type, no need to create a new one.
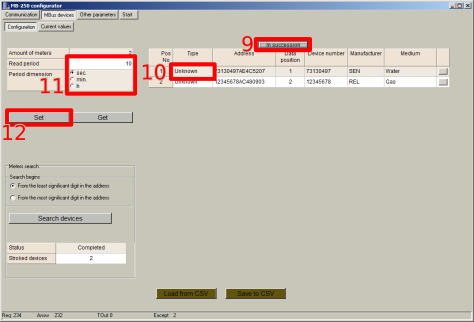
Set the gauge reading period (11) so that the gauges are not read unnecessarily often, but provide current data. Suitable values are 10 - 15 minutes. In the case of electricity meters it is possible to select a lower value.
For the subsequent correct setting of the central unit, it is still necessary to copy the order of the meters in the memory of the transmitter (Data position), which should again go in sequence. Use the In succession button (9) to line up the gauges.
When everything is set, save the settings using the Set button (12).
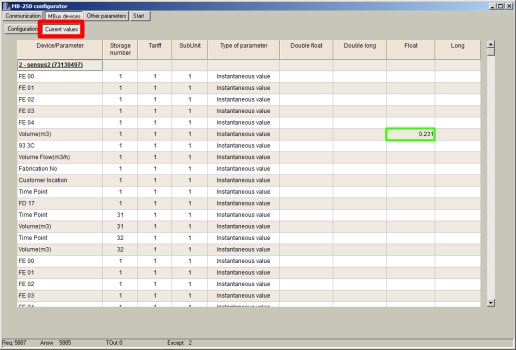
On the Current values page, check the stored values. If they match the actual state, we are done.